Table of contents
Open Table of contents
Motivation
I wanted a simple analytics tool that just tells me how many people visit my sites. I quit Google Analytics when UA‑4 launched—it was too fiddly. PostHog’s session recordings were nice, but the product felt heavyweight for my tiny projects.
I’d paid for Plausible Cloud for a while and loved its “month‑over‑month” chart views and referrer breakdowns, but $40 / month for 20 hobby sites was hard to justify. Each $20 tier only covers 10 domains.
Luckily, Plausible ships a Community Edition (CE) you can self‑host. That means my only cost is the VPS itself. The new quick‑start script doesn’t even need a reverse proxy, and Let’s Encrypt are baked in for automatic SSL. Installation turned out to be surprisingly painless.
Choosing the right host
To use Plausible, they recommend at least 2 GB of RAM. This would cost $12/month on Digital Ocean. 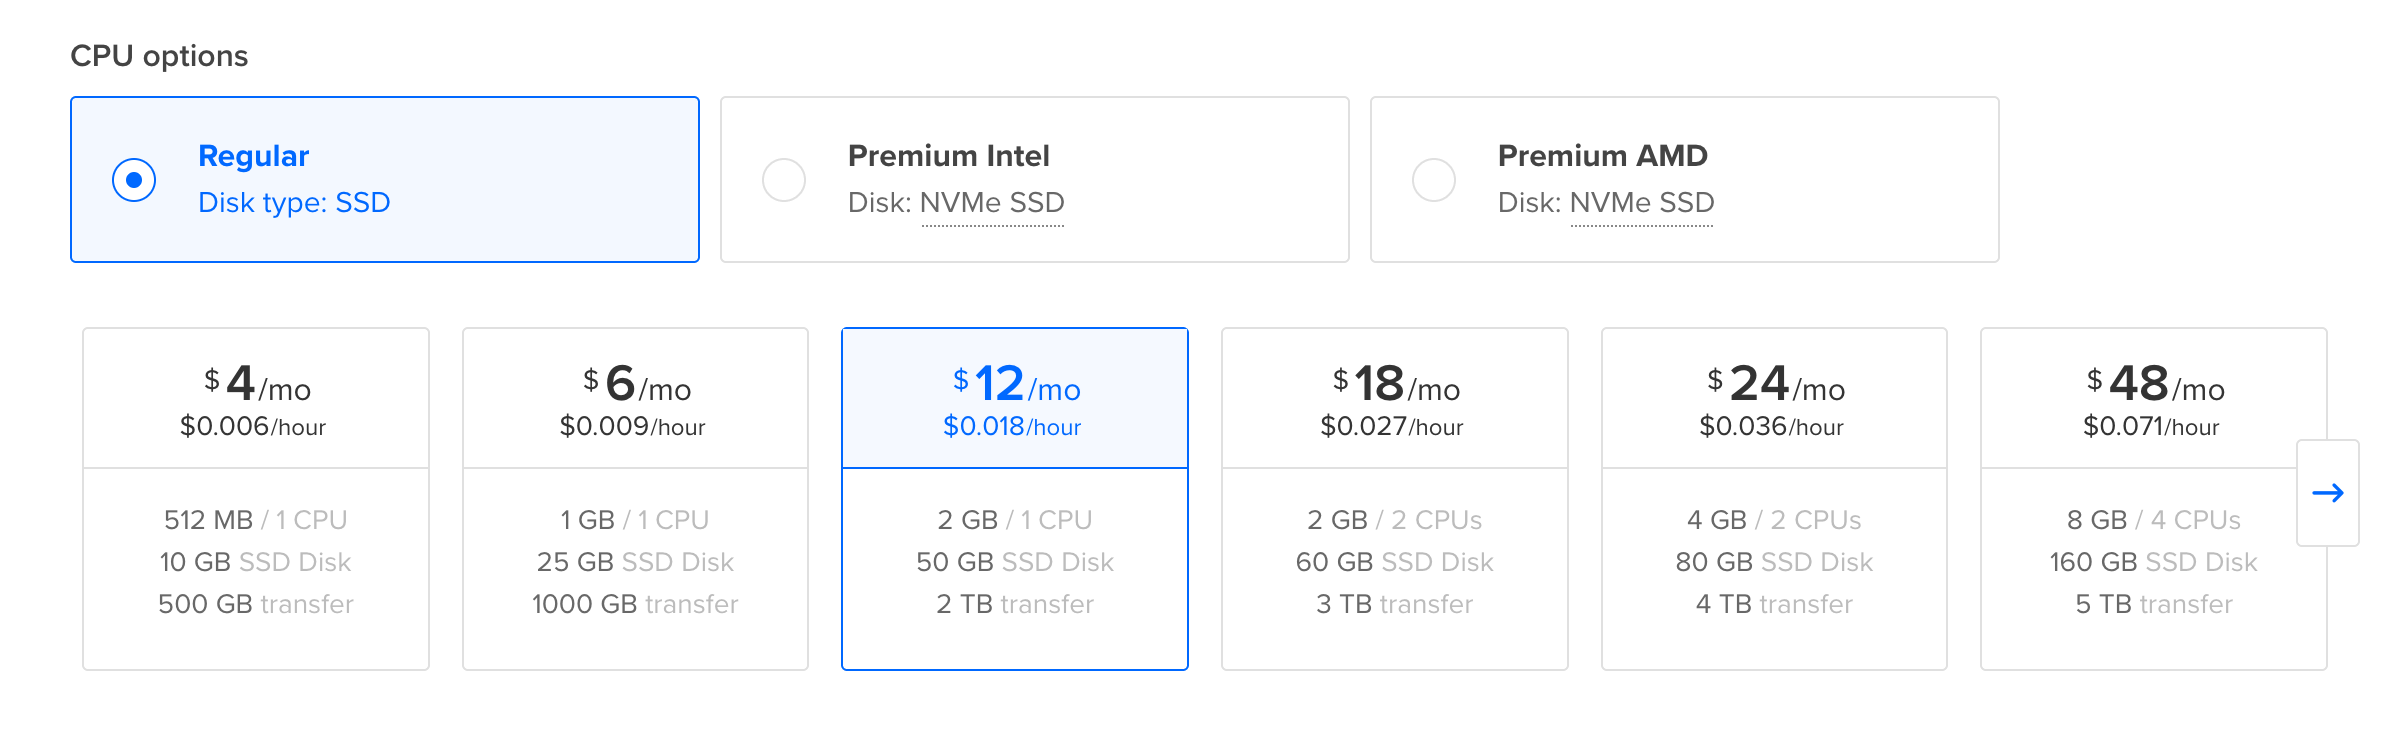
Hetzner gives you twice the RAM (4 GB) and 40 GB SSD for €3.79 or $4.46 based on the current EU to USD currency conversion.
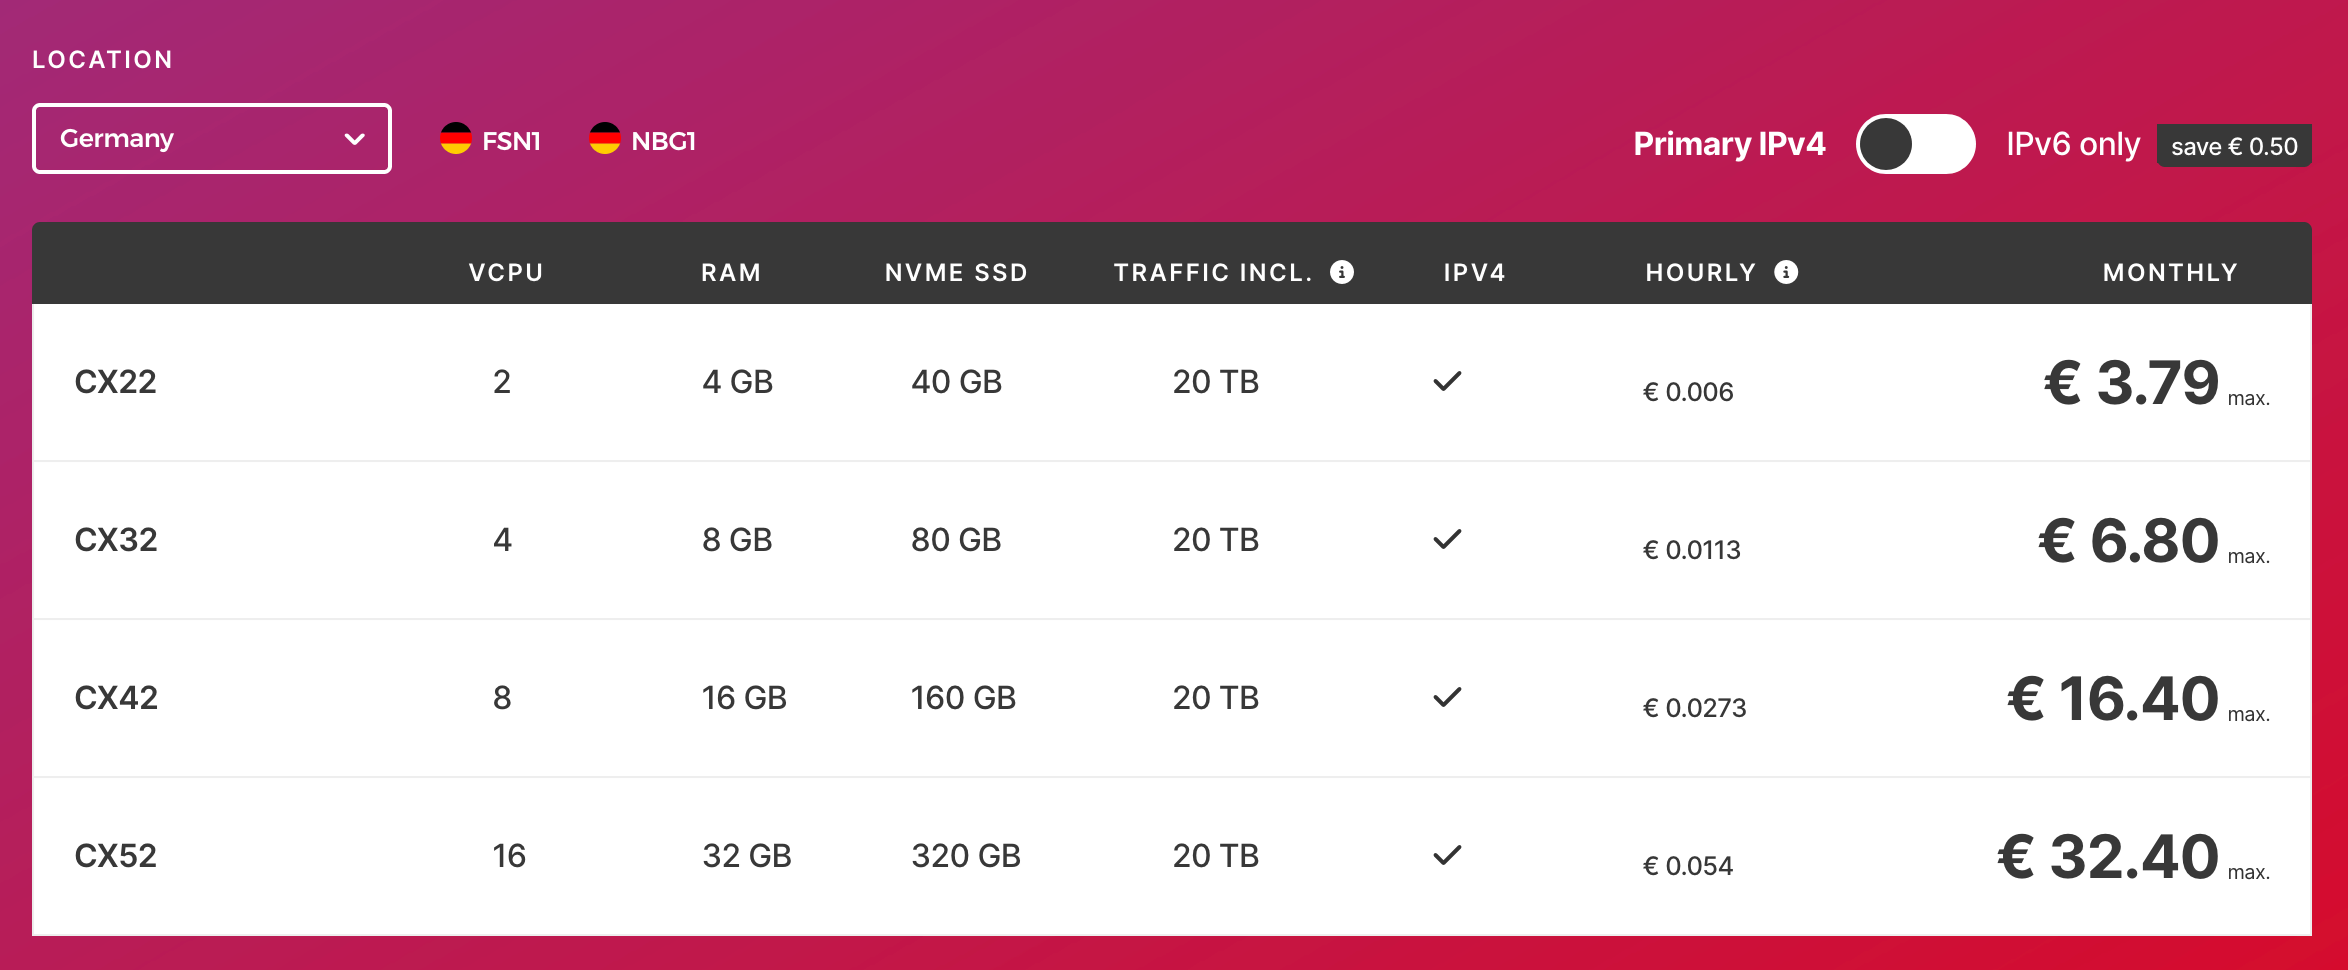
I went with Hetzner’s CX22 cloud option that has 4 GB of ram, 40 GB of storage and 20 TB of traffic. (Sign up with that link and you’ll get a $20 promo code for Cloud products—enough to cover about 4 months of hosting.)
Configuring the server
To get started, register an account and add a credit card. Then click on the “Create a server” button.
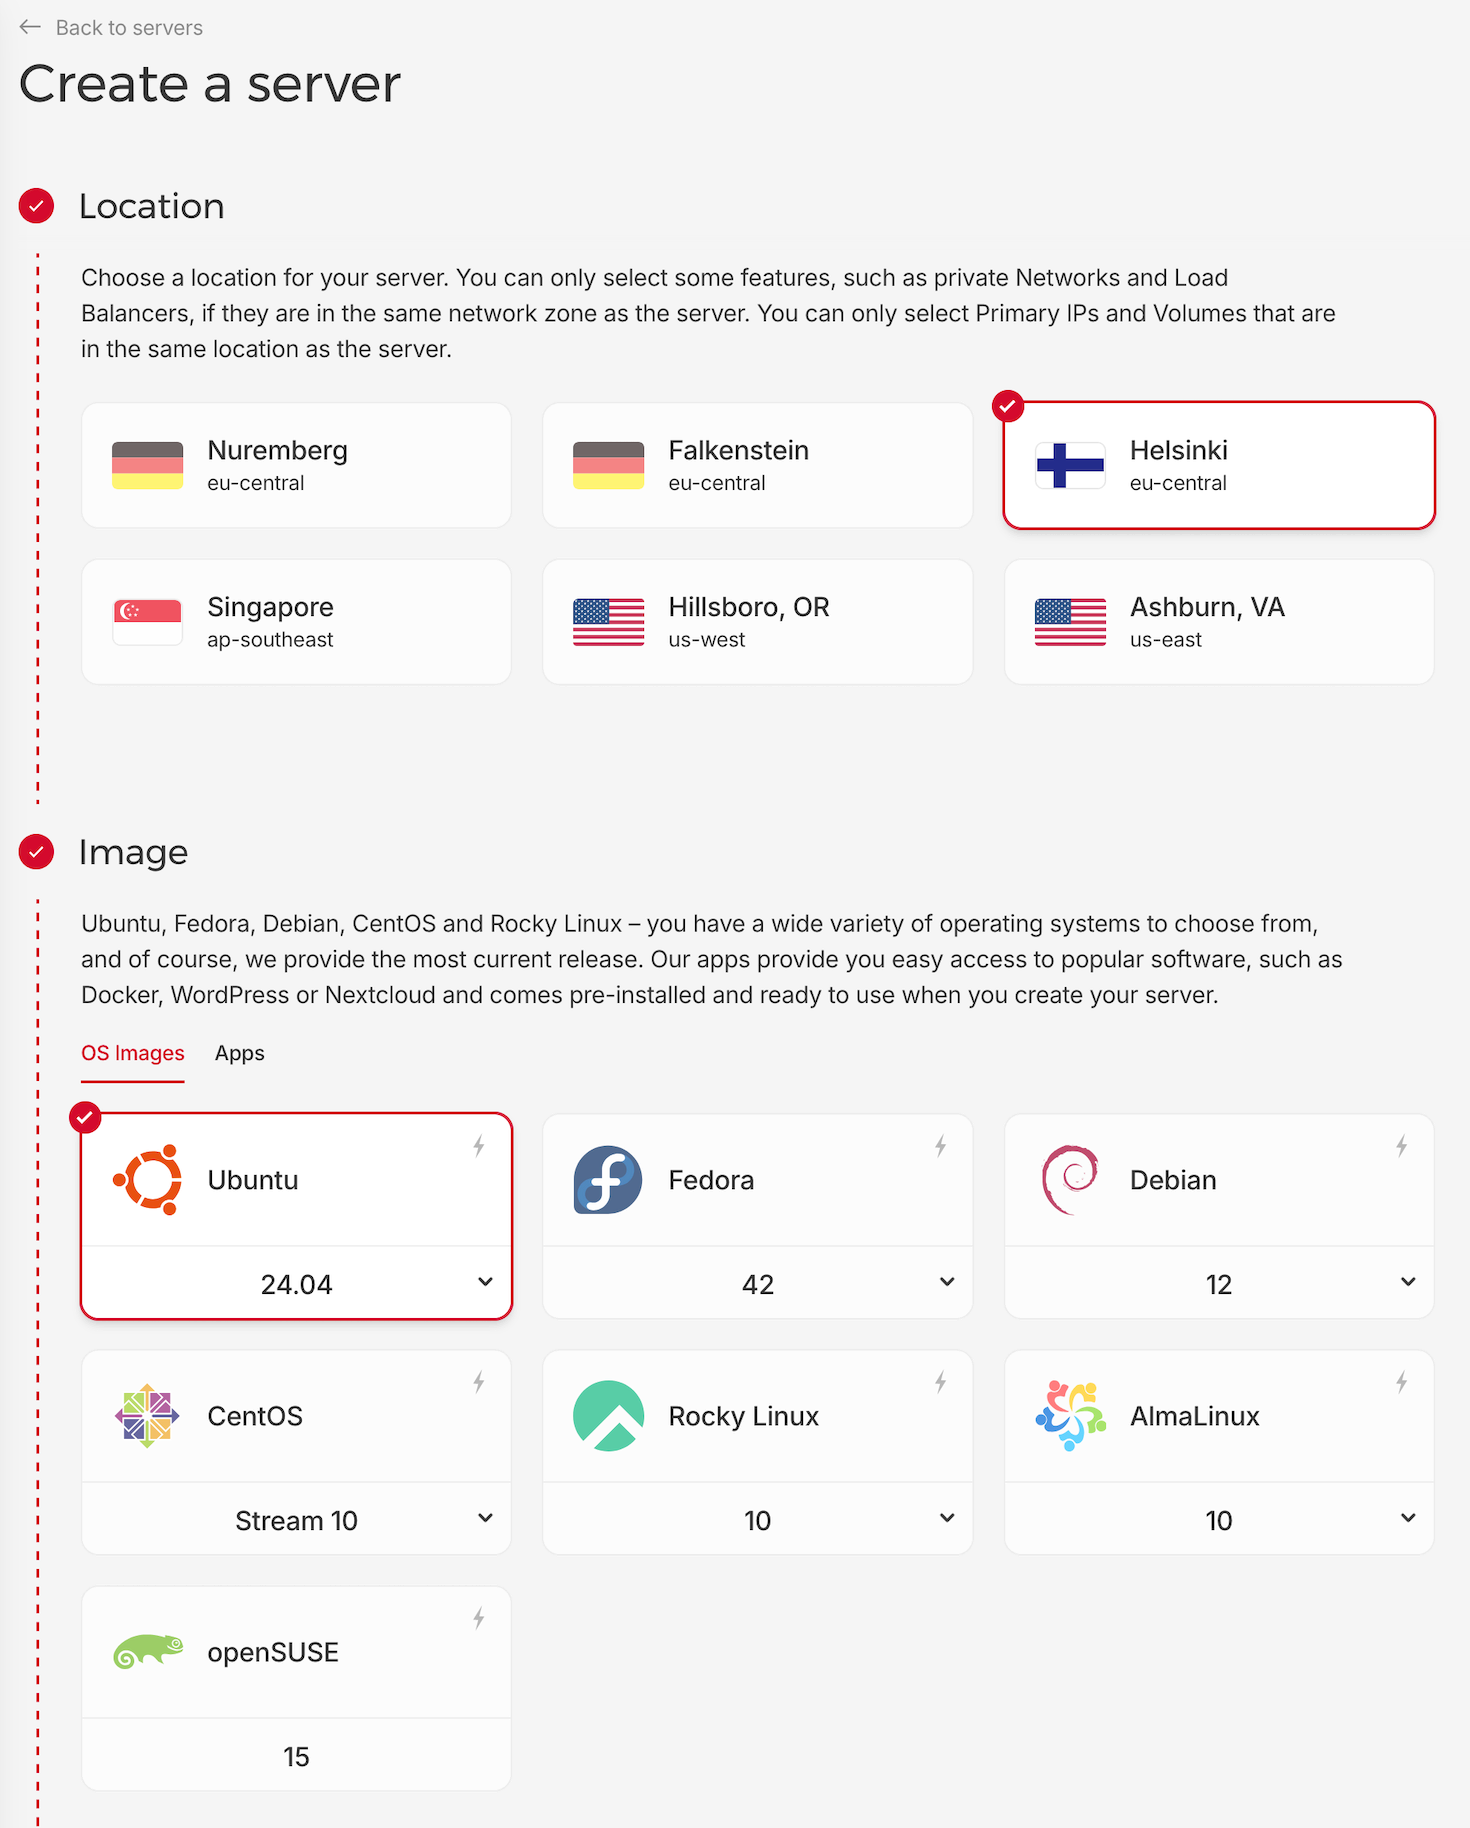
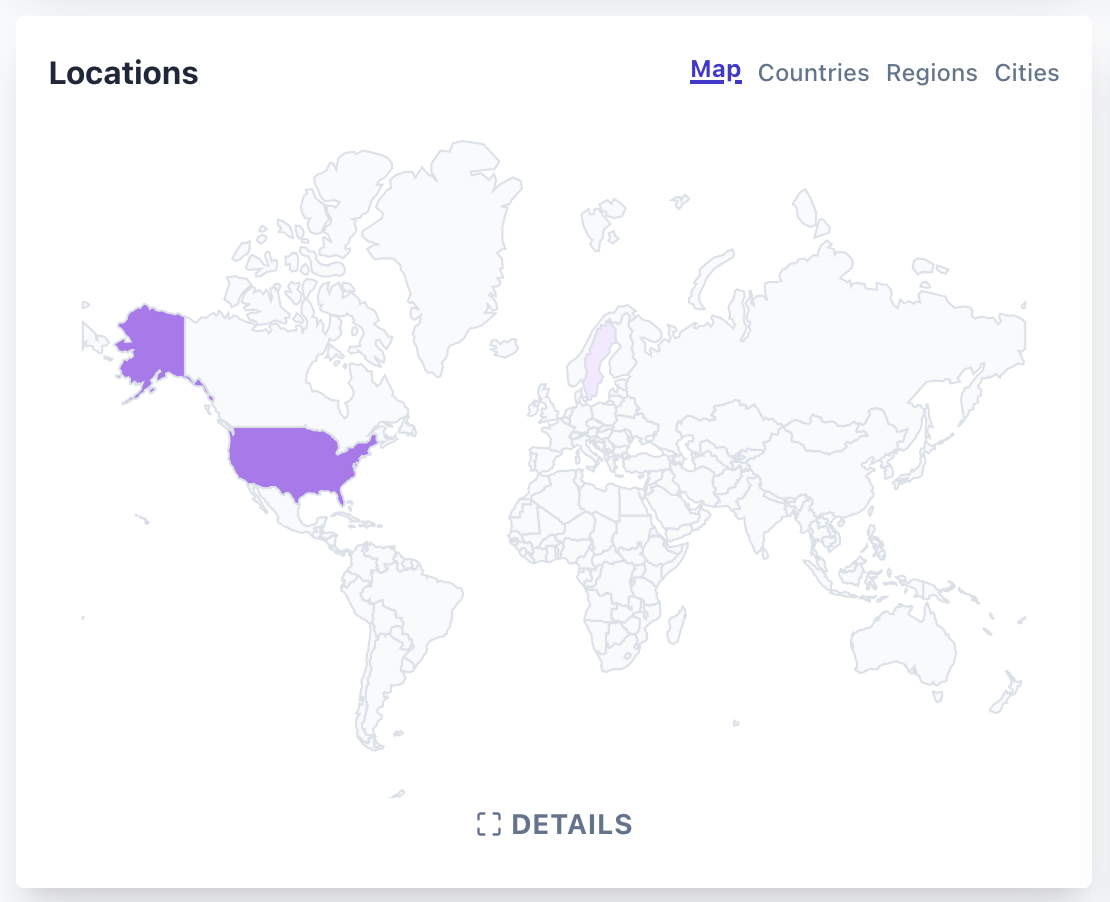
You can choose a location near you, but they may not have the low cost servers available. I stuck with the default of Helsinki and Ubuntu.
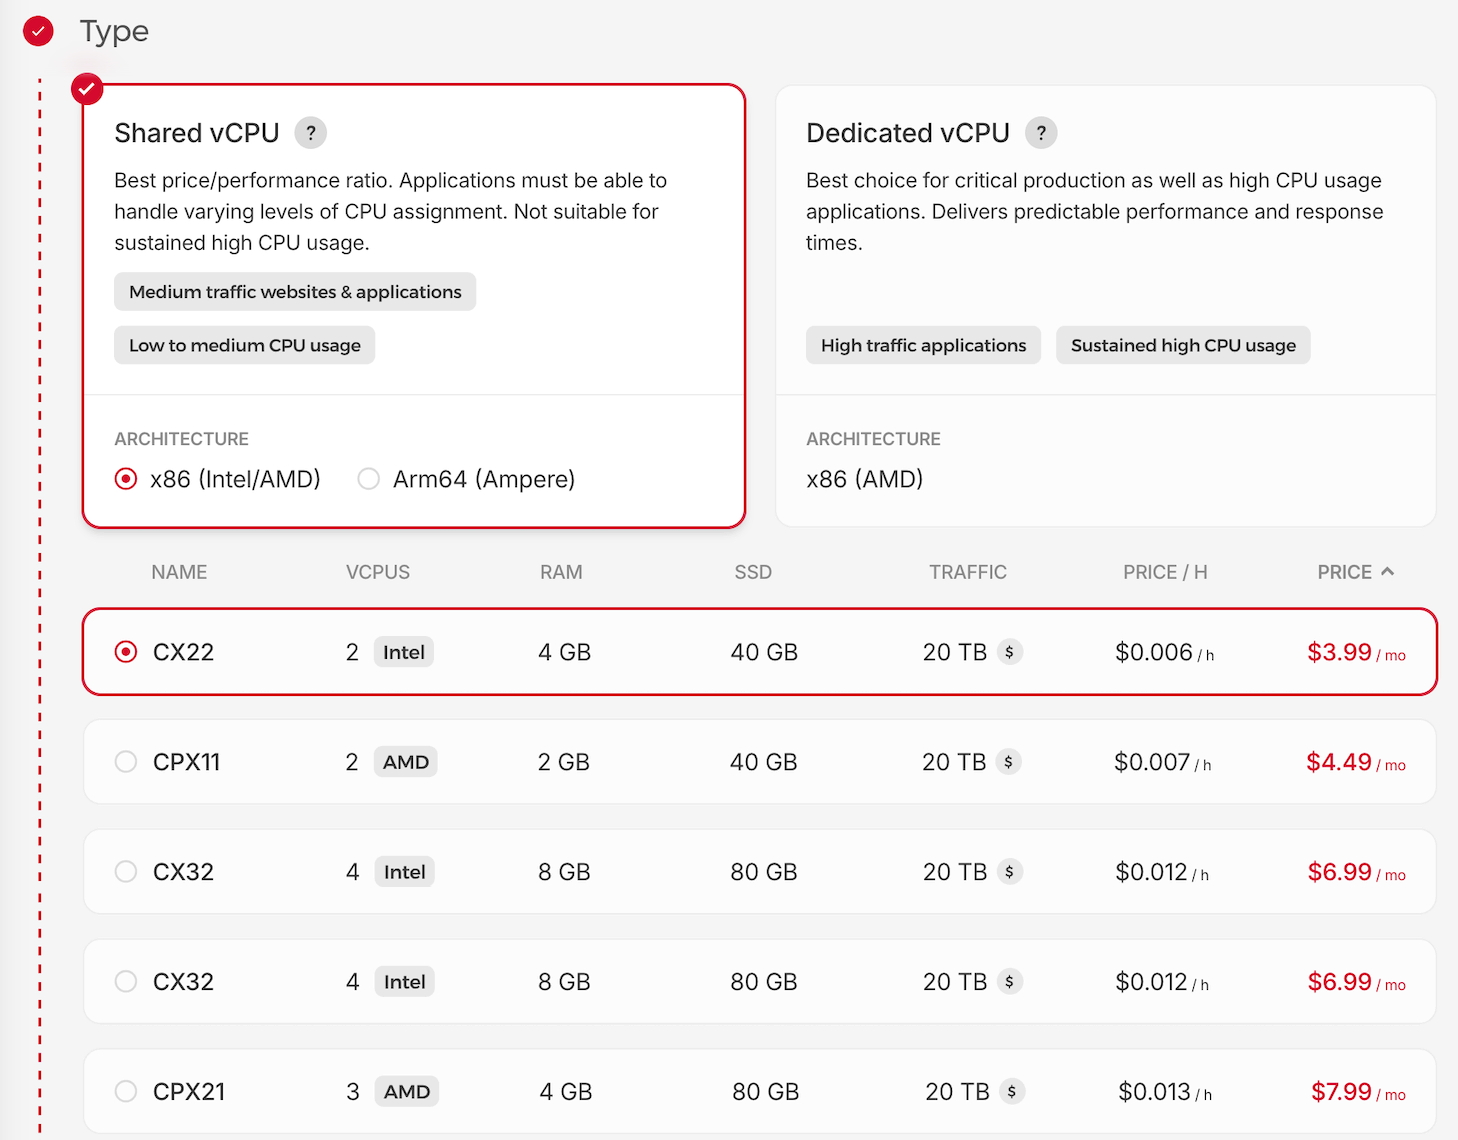
| Then choose the size of the machine you need. I went with the lowest price option, which is the CX22 Intel machine with: | 2 | 4 GB | 40 GB NVMe | 20 TB | €3.79‑€4.74 |
| Plan | vCPU | RAM | SSD | Traffic | Price (USD) |
|---|---|---|---|---|---|
| CX22 | 2 | 4 GB | 40 GB NVMe | 20 TB | $3.99 |
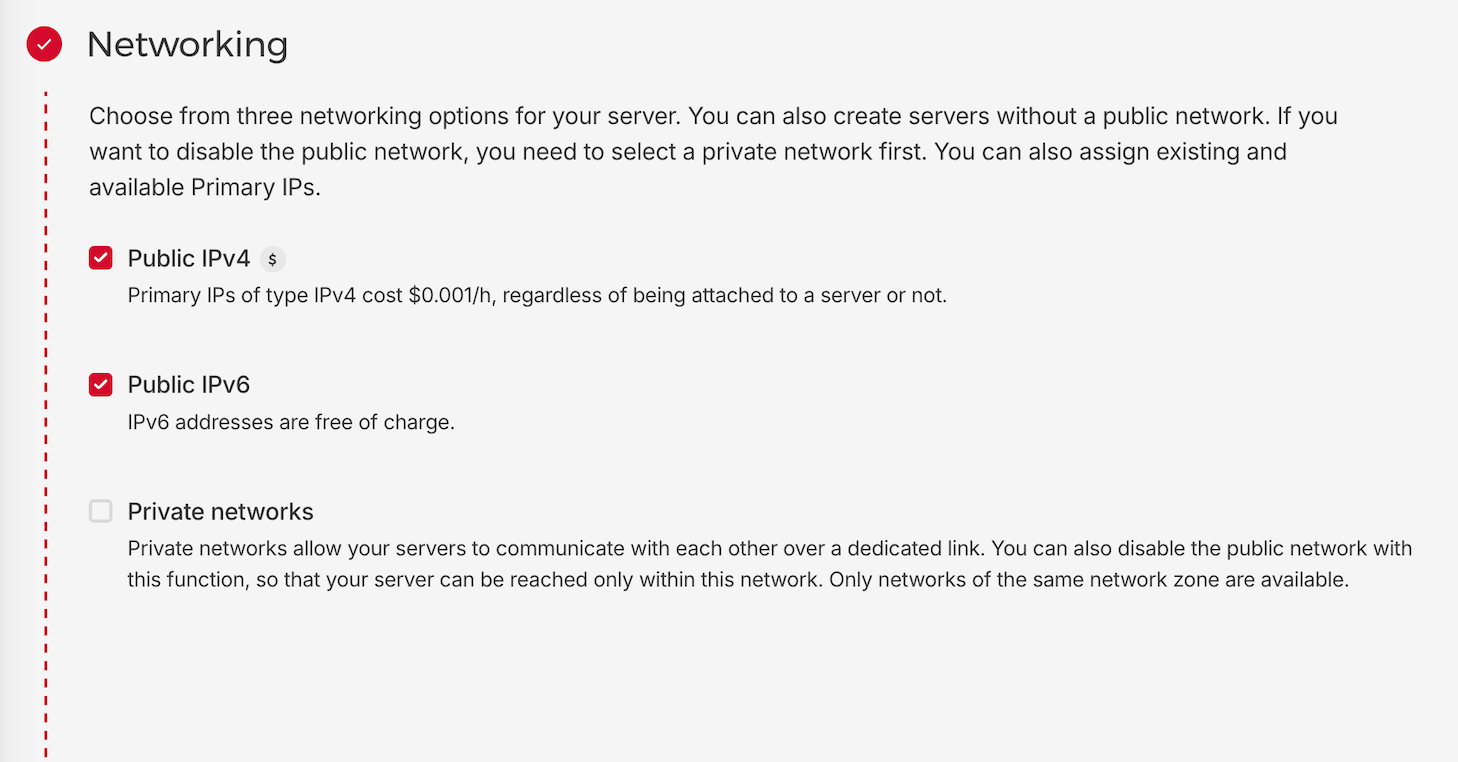
The next step is to choose if you want an IPv4 address. My ISP doesn’t provide me with an IPv6 address, so its either use some VPN to get that address, or add an IPv4 address as an added cost to my Hetzner server. I went with an IPv4 address which costs me an extra 80 cents/month.
I also pasted in an SSH key. This allows me to login through the terminal without having to type in a username and password. Saves quite a bit of hassle for those long complicated passwords since all our configuration will be done through the terminal window.
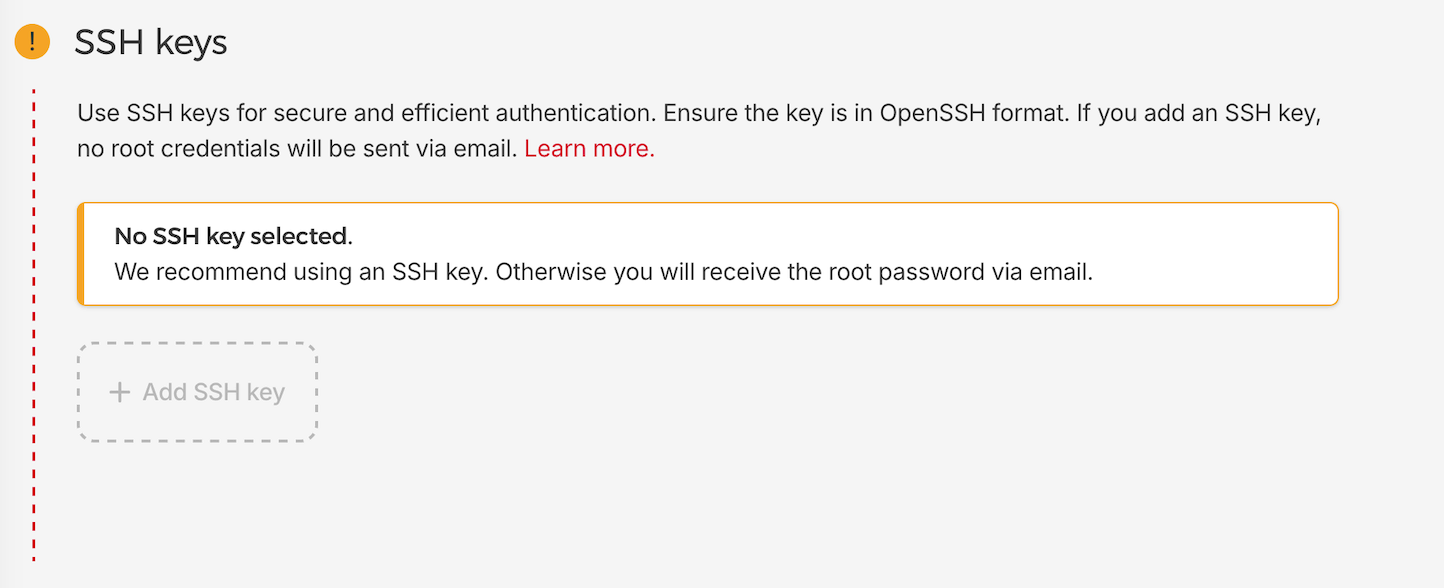
Github has instructions on how to generate SSH keys for Mac, Windows, and Linux. The idea is to generate the key and paste the public key into the Hetzner dashboard.
I left everything else default and then clicked the “Create & Buy now” button. My monthly total came out to $4.79.
Add a sub domain
Choose something that makes sense or is easy to type and remember. Something like analytics.example.com or plausible.example.com, or go with something short like a.example.com. This is the subdomain you’ll be logging into to access your plausible dashboard. This is also the subdomain that will be used in the tracking code that gets pasted into your websites head element.
Head over to your domain registrar and add an A record if you are using IPv4, and AAA if you using an IPv6 server address.

Enter your subdomain into the “Name” field and your servers IP address into the corresponding field. You can find the public IP address in your Hetzner dashboard.
Once you’ve got that set up, we’ll let the DNS settings propagate and finish setting up Plausible.
Log into your machine and install Docker.
Using that same IP address you just used for setting up your subdomain, open up your terminal or command line and enter either:
for IPv4
ssh root@203.0.113.1(Change “203.0.113.1” to the actual IPv4 address of your own server.)
or for IPv6
ssh root@2001:db8:1234::1(Change “2001:db8:1234::1” to the actual IPv6 address of your own server. You’ll see the IPv6 address in your dashboard as 2001:db8:1234::/64. To connect to your server, do not specify the network /64 in the end, but instead use the first address 1.)
Once you are logged in, install Docker. Follow the Ubuntu specific instructions on their page.
# Add Docker's official GPG key:
sudo apt-get update
sudo apt-get install ca-certificates curl
sudo install -m 0755 -d /etc/apt/keyrings
sudo curl -fsSL https://download.docker.com/linux/ubuntu/gpg -o /etc/apt/keyrings/docker.asc
sudo chmod a+r /etc/apt/keyrings/docker.asc

# Add the repository to Apt sources:
echo \
  "deb [arch=$(dpkg --print-architecture) signed-by=/etc/apt/keyrings/docker.asc] https://download.docker.com/linux/ubuntu \
  $(. /etc/os-release && echo "${UBUNTU_CODENAME:-$VERSION_CODENAME}") stable" | \
  sudo tee /etc/apt/sources.list.d/docker.list > /dev/null
sudo apt-get update
Install the Docker packages:
sudo apt-get install docker-ce docker-ce-cli containerd.io docker-buildx-plugin docker-compose-pluginAnd then verify installation by running the hello-world image:
sudo docker run hello-worldThis should get your Docker and Docker Compose plugin installed.
Install Plausible on your server
Now that Docker is set up, follow Plausible’s instructions on how to install their software.
It starts with cloning the repo in your terminal:
git clone -b v3.0.1 --single-branch https://github.com/plausible/community-edition plausible-ceThen change directories and make sure the correct files are there:
cd plausible-ceRunning ls -1, you should see these files:
README.md
clickhouse/
compose.yml
Then create your environment file by typing:
touch .envWe can edit this file instead of the compose.yml file directly.
Populate the .env file with the settings for your site:
echo "BASE_URL=https://plausible.example.com" >> .envMake sure $BASE_URL is set to the actual domain where you plan to host the service. The domain must have a DNS entry pointing to your server for proper resolution and automatic Let’s Encrypt TLS certificate issuance.
echo "SECRET_KEY_BASE=$(openssl rand -base64 48)" >> .envConfigure some ports with
echo "HTTP_PORT=80" >> .envecho "HTTPS_PORT=443" >> .envDouble check your .env file by running:
cat .envIt should return all the info in your .env file.
Add a Docker Compose override file by typing into the terminal:
cat > compose.override.yml << EOF
services:
  plausible:
    ports:
      - 80:80
      - 443:443
EOF
Start it all up with the Docker Compose command:
docker compose up -dYou should now be able to head to the sub domain you set up, something like https://plausible.exapmle.com and register an account. However, there are a few other details you should enable for a better experience, such as the ability for your account to send you emails and display the geolocation of your visitors.
Set up mail in Plausible
Plausible sends transactional emails every time there is an account activation or password reset. In addition, you have the option to have it email you weekly or monthly reports. In order for it to send these emails, it must know about a mail server. You can use your own email server or an API service.
- Mailgun option: Free tier allows for 100 emails/day. They will disable your account for inactivity, so if you aren’t logging into their dashboard or sending yourself monthly reports, they will close your account. Set this option by signing up for a Mailgun account, grabbing the API key and adding it to your .env file. Use a text editor like nano or use
echolike the previous steps in your set up.
echo "MAILER_ADAPTER=Bamboo.MailgunAdapter," >> .env
echo "MAILGUN_API_KEY=YOURAPIKEY" >> .env
echo "MAILGUN_BASE_URI=https://api.mailgun.net/v3" >> .env
echo "MAILGUN_DOMAIN=example.com" >> .env
-
If you use Gmail, you can use that account to send emails from Plausible. The guide for setting that up is available here.
-
I went with the third option which I felt was the fastest and most cost effective way to get the email set up. I ended up using my email providers SMTP server. You want find your settings and add the following settings, replacing your own values, to the .env file. You can see what each of these values are for in the configuration docs.
echo "MAILER_ADAPTER=Bamboo.Mua" >> .env
echo "MAILER_EMAIL=notifications@example.com," >> .env
echo "MAILER_NAME=Plausible notifications" >> .env
echo "SMTP_HOST_ADDR=smtp.emailprovider.com" >> .env
echo "SMTP_HOST_PORT=587" >> .env
echo "SMTP_USER_NAME=username" >> .env
echo "SMTP_USER_PWD=password" >> .env
echo "SMTP_USER_PWD=true" >> .env
Keep the map up to date
By default, there’s a database that has Plausible uses for geolocating IP addresses. If you want Plausible to keep the IP locations updated and more accurate, sign up for a free MaxMind GeoLite2 API key. Instructions are in Plausible’s wiki.
Install the tracking code
Now that you’ve got all the software set up, just follow Plausible’s on-screen instructions for adding a site and the tracking code to your websites.
That’s it — enjoy unlimited, privacy‑friendly analytics for the price of a fancy latte each month! 🎉